PCB Toner Transfer
There are lots of ways to prototype with through hole components - dead bug, Manhattan, Veroboard etc. But it is much harder with surface mount. I have used adapter boards with SMD ICs and have used a tile scribe to cut tracks on copper clad board but this is not practical with ICs or for circuits of any size. So I have started making my own PCBs.
I’ve been using KiCad’s Eeschema for some time for drawing schematics and so it didn’t take me too long to get up to speed with Pcbnew which is the KiCad PCB software. Considering it is free I am very impressed. But the layout needs to be transferred to the copper clad board before it can be etched. The “proper” way to do this is to print on acetate (such as overhead projector film) and then expose a photo resist board to UV light. But the toner from a laser printer works as a resist and if this is directly transferred to the copper clad board it makes the process much simpler and cheaper.
The transfer can be done using ordinary paper with either heat or chemicals but neither method is completely reliable. There are two variables in the process which make it somewhat hit or miss. Apparently Brother laser toner and many third party toners do not work. But then there are just as many online reports that they work fine. The choice of paper is crucial too. Ordinary copier paper absorbs too much of the toner making it difficult to get a clear transfer. The paper needs to have some gloss - laser photo paper is available - but many are using paper from a magazine - cut out a piece a bit bigger than the PCB and tape it to a sheet of normal printer paper and manually feed it through the printer. The heat or chemicals will transfer the laser toner but not touch the magazine ink.
I was initially inspired by this youtube video showing how nail varnish remover can be used to transfer the toner from a printout on magazine paper. I tried this with various papers (Radcom, Radio Times, Which?) but all I got was a big black smudge. My nail varnish remover (well my wife’s) is 98% acetone and this just dissolves the toner. The brand used in the video has a long list of ingredients and it appears that alcohol is the other key ingredient. There are other videos (such as this one) showing that a ratio of 3 parts acetone to 8 parts alcohol (ethyl or iso-propyl) is the best to use. I only had 70% IPA and I tried this but got no transfer at all - presumably too much water. Other comments suggest that a 1:1 mix of acetone and water works but I haven’t tried this. In the video he uses laser photo paper so this may also be a key ingredient of his success. I have lots of inkjet photo paper but I daren’t run this through the laser printer in case the heat from the drum melts it.
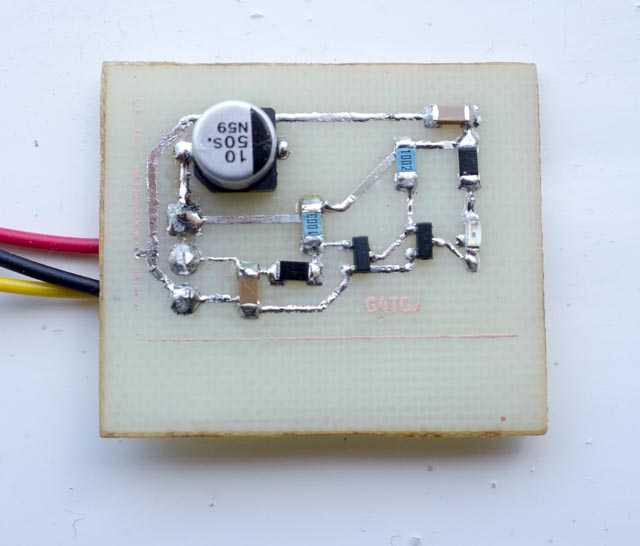
The next thing to try was heat which is the more traditional way of doing toner transfer. I used a normal clothes iron but others use modified laminators or heat presses to get even heat over the whole board. On a really small PCB this was moderately successful and I did manage to etch and build a small test circuit, but when I tried with a larger design the transfer was poor. Trying to get even heat from the iron is hard - being a steam iron means it has a lot of holes which presumably don’t get hot. This is why many use laminators or presses. If you do use an iron, make sure the steam is off!
I ordered bottles of acetone and IPA from RS to have a go with the magic 3:8 formula. The first attempt was not good so I tried with equal parts acetone and IPA. This was better and I managed a small design but again it was not good with a larger board. I tried a few different papers but it didn’t help.
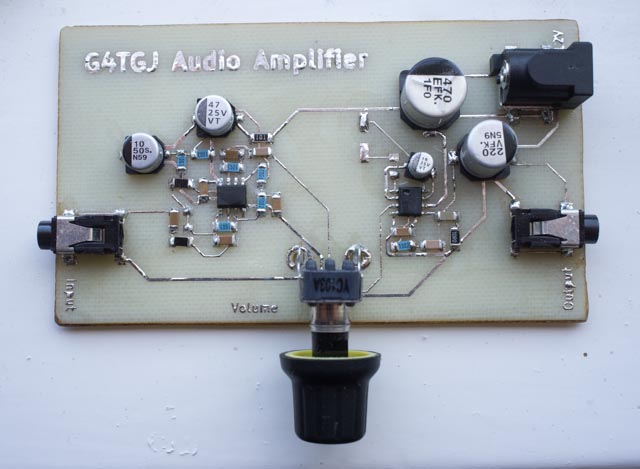
Fortunately I had also ordered some Press n Peel Blue which is specifically designed for toner transfer onto copper clad boards using a clothes iron. This came just as I gave up on the chemical transfer. The instructions say to use with a temperature suitable for acrylic and polyester for between 1.5 and 4 minutes. I set the iron to 2 and held it on the board, without moving, for 2 minutes and then spent the next 2 minutes ironing all over the board in an attempt to get the toner to transfer properly this time. After a total of 4 minutes I ran the board under the tap and peeled off the paper. To my delight the toner had transferred perfectly. In fact, it isn’t just the toner that transfers but also the blue from the paper (which feels more like plastic). I wore oven gloves this time so that I could hold onto the board while ironing it. Not surprisingly it gets very hot! After etching in ferric chloride I had a perfect PCB.
Clearly some people are having great success with using photo or magazine paper to do toner transfer but there seem to be too many variables. If you are lucky, or are prepared to spend a long timer experimenting, then you might also have success but I would suggest going straight for a ‘proper’ product such as Press n Peel. At about £3 per letter size sheet (close to A4) it seems very expensive. But since you only need to cut a piece out which is slightly larger than the PCB the 5 sheets I bought should last a long time. I used masking tape to stick the Press n Peel to the printer paper but others use 3M Magic Tape or Kapton tape.
There are a couple of other toner transfer products that might also be worth trying: Pulsar and a cheap yellow transfer paper available from eBay.
Finally, I should point out that you can only do toner transfer with a laser printer and not with an inkjet. Laser printer toner is plastic dust that the printer fuses to the paper with heat. An ink jet printer does not use toner.